Tag Archives: Gardening

Huffington Post: Rise, Fall & Rise of New York City’s School Gardens

Every now and again, you stumble upon what is simply a great story. Daniel Bowman Simon’s Rise and Fall of School Gardens in New York’s Past Can Guide Us Into the Future traces New York City’s early community gardens, such as the 1902 Children’s School Farm in DeWitt Clinton Park on 54th St. and 12th Ave. in Manhattan, which was planted as much for the civic virtues and love of nature it would instill in its young gardeners as it was for its vegetables and flowers.

A couple of years after its inception, there would be a whole School Farm movement, with an astonishing 80 plots in New York. In 1931, there were 302 school gardens, which accounted for 65 acres.

Over time, the gardens vanished. In most cases, their land was redeveloped. Simon notes that we need to take heed and not let that happen again. He cites some wonderful trends regarding the current uptick in school gardens – namely First Lady Michelle Obama‘s White House Garden and other programs that I’ve written about here, the new school garden at P.S. 29 in Brooklyn that New York City Mayor Michael Bloomberg and celebrity chef Rachael Ray helped promote, and the work of the Children & Nature Movement.

Do yourself a favor and read the article. The graphics are wonderful. And the story turns out to be the writer’s testimony in the recent public hearing held by the NYC Department of Parks and Recreation, which very recently completed a set of community garden rules designed to strengthen protection for gardens.

White House Photo: Samantha Appleton

From Treehugger: Frugal Green Living Posters

Canning, victory gardening, carpooling, conserving resources, living frugally — There are a lot of parallels between a whole swath of trends and activities today and those from the 1940s. In both periods, outside forces (war, the economy, the environment) have caused a lot of us to take stock and change some of our homefront habits. In the process, many of us discovered or rediscovered some relatively lost arts on the way to using less.

The always-relevant Treehugger has offered a terrific blog post, Frugal Green Living: Posters for the Movement, which features a collection of 1940s posters that, while making statements urging people to reconsider wasteful habits, are also themselves wonderful examples of message-oriented graphic design at its mid-century zenith.

I love these for their bold graphics and nostalgic style and marvel that they are fairly relevant today – except for the last one, of course. Though Treehugger makes the point that cooking fat is now collected for biodiesel fuel, rather than to make explosives. And that is undoubtedly a good thing.

Posters: Minneapolis Public Library

Top 10 Vegetables for Home Gardeners

Tomatoes top the National Gardening Association‘s list of the Top 10 most popular vegetables grown by home gardeners. A whopping 86% of gardeners said they planned to grow tomatoes, when surveyed.

Here are the Top Ten and the percentages of people who said they planned to grow them:

1. Tomatoes (86%)
2. Cucumbers (47%)
3. Sweet peppers (46%)
4. Beans (39%)
5. Carrots (34%)
6. Summer squash (32%)
7. Onions (32%)
8. Hot peppers (31%)
9. Lettuce (28%)
10. Peas (24%)

On the bottom of the list? The lowly Rutabaga only had 1% of gardeners’ support.

Looking for other Gardening lists? See these for ideas about:

Top 10 Heirloom Vegetables to Try

Top 10 Vegetables for the Urban Garden

10 Shade-Loving Vegetables

Once you’ve been inspired to plant, you may want to check out my earlier post, How to Get Growing if You’re a Total Beginner. Tomato season may be winding down (though hope remains for my Oregon Spring cherry tomatoes and a relatively warm fall), so the Gardening Association suggests planting fragrant fall annuals such as snapdragon, stock (below), and sweet alyssum.

Photos: Jean-noël Lafargue (top), Susan Sachs Lipman

Poster: University of N. Texas Libraries

How to Save Nasturtium and Other Seeds

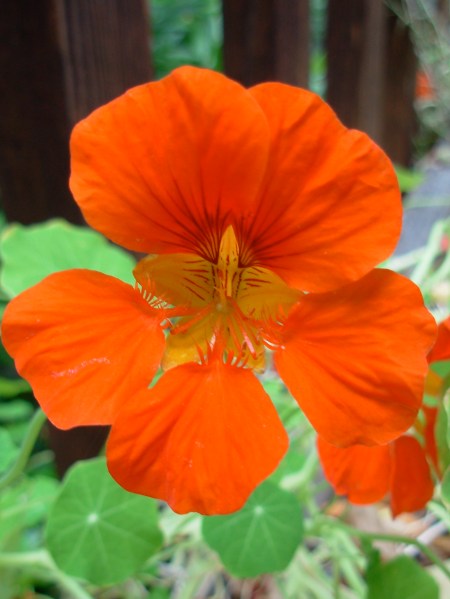
I love nasturtiums and this summer I had a real cascade of them tumbling over the deck boxes in their bright colors and peppery scents. My daughter and I went to weed them the other day and noticed that many had gone to seed and still many others had dropped their seeds on the deck. We gathered the seeds excitedly, figuring that since they were intact and recognizable as the nasturtium seeds we’d planted before, we should be able to save these for planting in the future.

After all, what better way for kids to learn about the process of seeds becoming plants than to collect, save, plant and grow their own seeds?

I since found a couple of wonderful resources about seed saving.

Mr. Brown Thumb has a lot of great information about collecting nasturtium seeds, complete with a video. He says that larger seeds are best, and that it doesn’t matter if the seeds are brown or green. This is good news because I found plenty of both.

About.com has a lot of great information about seed saving in general, including which other seeds are good candidates for saving:

Methods and Timing for Saving Seeds

Always choose the best quality plants, flowers, fruits and vegetables from which to save seeds. Look for disease resistance, vigor, great flavor and productivity. Next year’s plants will only be as good as this year’s seed. Harvest seeds either:

  • When the seed pods have dried on the plant (flowers, beans, broccoli, lettuce…)Keep an eye on the pods as they start to brown. Most seed pods will open and disperse on their own. You can catch seed by placing small bags over the seed heads when they look ready to pop or by pulling the plant just before completely dry and storing upside down in a paper bag.

Storing Saved Seed

  • Make sure the seed is completely dry, or it will rot or mold in storage
  • Remove as much of the chaff as possible
  • Store in a paper envelope, labeled with the variety and year
  • Place the envelopes into an air tight container, such as a canning jar
  • Store in a cool, dark, dry place
  • Stored seed is best used the following year

What Seeds Can Be Saved?

Open Pollinated or heirloom, self-pollinated plants are the only varieties that will grow true from seed, meaning the seedlings will be exactly like the parents. These are the seeds worth saving.

Self-pollinated plants are the easiest to save and include: Beans, Chicory, Endive, Lettuce, Peas, Tomatoes. You can also save many heirloom flower seeds such as: cleome, foxgloves, hollyhock, nasturtium, sweet pea, and zinnia.

I dried my seeds on this old bulb storage crate from the Netherlands. It’s come in handy for all kinds of drying projects.

I stored my seeds according to the above guidelines. I’ll plant them next year and will let you know how they do.

Photos by Susan Sachs Lipman

Happy Bastille Day: Stir up Some Ratatouille

Are you wondering how to use your abundance of mid-summer tomatoes and zucchini, and celebrate Bastille Day at the same time?

One word: Ratatouille.

200px-Ratatouille

This tasty, colorful melange never fails to summon summer, while providing a few helpings of vegetables or a fool-proof side-dish that works with fish, chicken, lamb, noodles, and more. Ever since I first lived on my own in college, it has been the rare period when I haven’t made some.

Food historians generally date ratatouille to 18th century France, and to the area of Provence, and the town of Nice, in particular. Its name hails from the French verb, touiller, which means “to stir, mix, or toss”.

My own ratatouille has changed a lot since the days when I cut cubes of zucchini and eggplant and set them to boil in a pot of canned tomatoes. It’s as if the recipe itself has both mellowed and allowed for more complication, just as a good pot of ingredients, over time, coalesces into an especially flavorful whole. Diehard ratatouille purists may insist on sautéing each ingredient separately, but here you get the same effect, while also saving a little time.

4 Tbsp. olive oil
1 onion, chopped
6 cloves garlic, pressed
3 bell peppers, chopped (2-3 colors)
1 large eggplant, chopped
2 medium zucchini, chopped
2 summer squash, chopped
20 or so olive halves
2 14 oz. cans tomato chunks, or equivalent fresh tomatoes
2-4 tsps. each oregano and thyme
Feta or parmesan cheese, optional

Coat eggplant pieces in 2 Tbsp. oil and bake in a baking dish, uncovered, at 350 degrees for 25 minutes, until soft.

Heat remaining 2 Tbsp. oil in heavy skillet over medium high heat.

Add onions and sauté, turning occasionally, just until golden.

Add pressed garlic and sauté.

Mix in peppers, cooked eggplant, zucchini, summer squash, and olive halves.

Sauté whole for 10-15 minutes.

Add tomato chunks and spices to just boiling. Reduce heat to medium and cook for another 5-10 minutes.

Serves 4-6 as a main course. The recipe can easily be halved or doubled. Serve plain, hot or cold, top with feta or a dry Italian cheese like parmesan, or spoon over pasta.

Photo: wikibooks.org

A Slow Classic Reprint, first run 7/14/09

Celebrate May’s Full Moon

Gaisberg_and_rising_full_moon

According to the Old Farmer’s Almanac, today is the night and day of May’s full moon. The May Moon is known as the Full Flower Moon, in the moon naming tradition that was used by the Native Americans, largely Algonquins, who lived in the Northeast U.S., from New England to Lake Superior in the Midwest.

The Full Flower Moon received its name because of the abundant flowers that carpeted the land during its time. It’s also been called the Full Corn Planting Moon and the Milk Moon.

I’ve long been quite entranced with the full moon names and their variations. Of course, they reflect both the need to mark passing time and the way that time was experienced by people who were living close to the land. Lunar time-keeping pre-dated our modern calendars (and some calendars, like the Jewish and Chinese calendars, are still lunar-based.) The Farmer’s Almanac has a good list of Native American full moon names and how each came to be.

Other, even older, cultures have had moon naming traditions, too. This site lists full moon names from Chinese, Celtic, Pacific Island, Native American, Pagan, and other cultures.

Lots of people garden using the phases of the moon. The good news is that there isn’t one best time to plant — Each aspect of planting has an associated moon phase, based on how much moisture is pulled up through the soil by the monthly pull of the moon (much the way the moon influences the tides.)

The time just after the full moon is an especially good time for planting root crops, as the gravitational pull is high (adding more moisture to the soil) and the moonlight is decreasing, contributing energy to the roots. For this reason, the waning moon is also a good time to plant bulbs and transplants.

One great moon is known to all farmers, late September or early October’s Harvest Moon (also known as the Blood Moon, Blackberry Moon, or Hunter’s Moon), which traditionally shines its all-night beacon to help farmers gather their crops. In the Northern Hemisphere, it happens to be an especially close, bright moon, in addition to sometimes lighting up the sky for days. I wrote about the Harvest Moon here.

The Farmer’s Almanac offers a wonderful moon phase calendar for the U.S. that allows you to plug in your location and get the exact time of your local full moon.

Enjoy the Full Flower Moon!

Photo: Matthias Kobel

Gardening 101: How to Get Growing, Even if You’re a Total Beginner

You might read gardening magazines in the market — their covers emblazoned with the greenest leaves and the most perfect flowers. You may have even brought some home and, inspired by the pictures, attempted to create a garden plot or at least grow a few tomatoes for a salad.

Maybe you’ve never tried gardening at all but you’re curious to try it, to join those who are growing their own food and picking flowers from their yards.

Everyone has to start somewhere. Even if you’ve never grown so much as a pansy, the following steps will get you and your garden up and running.

Select your site. Ideally your plot will get 6-8 hours of full sun per day. If such a site is not available, be sure to buy crops specifically intended to grow in the shade. If you don’t have adequate flat space, explore other outdoor space like patios, pass-throughs, or decks. You can still get a lot of usable space by planting in large boxes and having plants climb up trellises, which many love to do. Your space needn’t be too large. A 10×10 foot plot can support a few rows of different crops. Often gardeners get overly ambitious and plant more than they can reasonably maintain. If your site is traveled by munching animals, such as deer, you will want to construct some kind of fence around it.

Prepare the soil. Use a pitchfork to loosen the ground, preferably down to about 8 inches. Clear the surface with a heavy-duty rake. Break up dirt clods and pull weeds. These can be added to a compost, if you’ve chosen to compost. If you wish, you can buy packaged soil for a nice even top layer that will have some nutrients in it, especially if you suspect your soil is poor. (You can always take a sample into your local garden-supply store for an opinion.) Either way, some sort of packaged fertilizer should be added as well. A general mix for new plantings is usually good, but the folks at the garden center may have more specific advice based on your soil and what you’d like to grow, as well as how much organic matter you want to add. Always water thoroughly before adding fertilizer. (And have kids wash hands after handling.)

If possible, plan some paths in your garden. They will make it easy to water, weed, and harvest without stepping on plants. Some people cover the paths with tanbark or other material (available at garden-supply stores) to mark them and to discourage plants from taking root there. Make sure you have a good path for your hose and a water source.

Plant the seeds or seedlings. For most people, this part is especially fun. Follow the packet instructions for seed spacing and conditions. You may want to lay a line of string as a guide, or create a furrow. Some stores carry seed tapes, which you just lay down in a straight row. Tapes are great for tiny hard-to-handle seeds like carrots, which can be difficult, even for adults. Large, easy-to-plant and -grow seeds include nasturtium and pea. If you’re planting bedding plants, be sure to give each lots of room to spread out and grow. Try to anticipate the heights of your plants to get the tallest ones into the back.

Fertilize. If you didn’t add fertilizer to the bed while preparing the soil, you’ll want to add a little bit while planting. There are fertilizers on the market that are designed specifically for new growth. Your local garden center is the best bet to point you toward a good fertilizer for your garden and conditions. Many people fertilize plants again at about six weeks into the growing process.

If you are gardening in containers, get the biggest containers you have space and money for. Check for adequate drainage holes. If you don’t have good drainage, you can add netting or pieces of broken pottery to the bottom of the pot. You may also want to add perlite, which will aerate the soil while helping it retain moisture. Fertilize as you would in a garden plot.

Water your plants or seeds. New transplants and freshly planted seeds like lots of water. The best kind of watering is done gently and deeply, so that the water soaks through to the growing roots of the plants. Once your plants are established, you will probably need to water every other day or so when the weather is sunny. (Plants in containers usually need water more often than plants in the ground.) If a plant droops during the day, or the soil feels dry more than a couple of inches down, it needs water. It’s best not to water in bright sunshine because the sun can evaporate the water or even cause burned spots on the plants.

Keep up the good work. Continue watering and caring for plants as needed. This can include pulling out obvious weeds and cutting back any growth that has died or become unattractive.

Be sure to harvest what you’ve grown. Sometimes I’ve been so proud of my work and/or not sure when to harvest that I’ve let plants go past the point when they’re edible or useful and all the way to seed. Take a chance and cut and enjoy what you’ve done. More will usually grow back!

Get comfortable. There are lots of items available to make gardening more comfortable. I suggest knee pads, if you’re going to be doing a lot of kneeling, a sun hat to protect your skin, and old shoes you don’t mind getting dirty or gardening clogs made specifically to get wet and dirty. (A pair of gardening clogs lasts for years. They’re also very comfortable and you can leave them outside.) Most people like gardening gloves and there are a range of them on the market. I find them irresistible to buy at gardening and hardware stores, with their cute patterns, but I almost always end up taking them off and getting my hands really dirty — the better to feel the plants, the dirt, and what I’m doing.

Have fun entering one of the oldest and most rewarding hobbies around!

Earth Day and Every Day: 11 Ways to Make Gardening Extra Fun for Kids

With Earth Day upon us, not to mention the warmer and longer spring days, many of us have been heading into our gardens. Around much of the Northern Hemisphere, this is the peak time to sow some seeds into the ground, as well as plant a lifelong gardening habit into the children in our lives.

Gardening helps families spend time together outdoors, take pride in growing our own food, and connect to others who have lived on the land before us. Although gardening offers a bounty of simple wonder, beauty and fun for even the smallest children, it doesn’t hurt to employ a few methods for getting and keeping them especially engaged.

Here are some simple ways to maximize your child’s interest in the garden.

Let children select some plants they want to grow. Something magical happens when one has ownership of a project from its initial stages. When choosing plants, check that you have the right growing conditions for them to help ensure a successful experience. Planting information is available on seed packets and through garden-supply store folks, who are generally very helpful. You can choose seeds, young seedlings, or a combination of the two. Seeds are more cost-effective and can be especially rewarding and wondrous. Bedding plants of course give your garden instant color.

(As an aside, my daughter always picked marigolds, as did I when I was a kid. They’re so colorful and cheery and happen to be easy to grow from seedlings or seeds. Perhaps most children are drawn to bright marigolds.)

Chop chores into small blocks. Kids can lose interest if the project seems daunting. Try to break up the tasks into doable chunks and over more than one session if necessary.

Make a sign that identifies the garden, area, or container as the child’s. The sign can be as simple as a painted rock or as ambitious as a mosaic-tile kit from an art-supply store. If other people are sharing the garden, you can still identify different children’s plantings by putting each name on a wooden stick (available in bags at garden-supply stores) in permanent ink.

Create a fun space in the garden. This can be a hiding place that you create with trellises or plantings; a tree stump that can serve as a table for tea parties; or an area that is decorated with whimsical objects you make or find. For instance, pipe cleaners and beads can be used to make simple butterflies, mushrooms and flowers — they can be placed among the plants and can get wet and still last a long time.

Attract animals to your garden. Certain plants and flowers are known to attract various butterflies and birds. This can add another level of delight for children. The National Wildlife Federation has information about how to turn any garden into a habitat for wildlife. Even if you don’t get your garden “wildlife” certified, there are a lot of fun, helpful tips for bringing creatures into your yard.

Let your child plant. This goes back to ownership, plus it’s just so much fun to put seeds into the ground and then watch them come up. Large seeds like nasturtium, peas, beans, sunflowers, and gourds can be especially easy for children to handle and poke into holes. Smaller seeds can be mixed with coffee grounds for scattering. You can usually tell the relative size of a seed by shaking the seed packet. You may also want to look for seeds that will sprout and mature relatively quickly.

Let your child water. Most children love to water. Teach them to check the soil by poking a finger down a couple of inches. If they feel moistness, there’s no need to water. If it’s dry, the plant is thirsty. It’s also best to water early or late in the day, so that the water doesn’t dry out in the sun before getting to the roots of the plants. Water fairly deeply and try to get the water into the dirt instead of right on the plants, where it can damage leaves and stems.

Let your child harvest. Children also love to harvest what they’ve grown. Be sure to have them experience picking their own vegetables or flowers (with you helping to cut stems, as necessary.) Cooking or baking with the food you’ve grown is, of course, a delight. Strawberries are really fun to grow and eat right in the garden — I’ve had the best luck with young plants rather than seeds. Catnip is fun to grow if you have an appreciative cat. And flowers are fun to give others on Earth Day, May Day or anytime.

Avoid the use of pesticides in any garden that you’ll be eating from, or even spending time in. If your garden does develop an unwanted species, take an affected piece of the plant to your local garden-supply store and ask for advice on how to treat it organically.

Let the diggers dig. Some children prove especially interested in what’s under the ground. For them, an area in which to dig and look at worms and other creatures may be ideal.

(Relatedly, when my daughter’s wonderful pre-school learned they were going to have new-home construction occur next door, they cut a hole in the fence and covered it with plexiglass. A whole group of kids regularly watched the bulldozers and other tools of construction with fascination. In other words, it’s good to remember that kids aren’t necessarily interested in the same things we are.)

Allow for mistakes and experimentation. Children can learn early that things don’t always grow as planned. Likewise, gardens can be wonderful places to explore, experiment, and observe.

Look for future articles here with more specifics about how to get your garden started and some fun ideas for kids’ garden projects.

Photos by Susan Sachs Lipman

Tulipmania 2010, Part 2

In my last post on tulips, I featured the Parade and Apeldoorn tulips and gave some background on the Tulipmania that gripped otherwise sensible people in 17th century Netherlands. This post will continue to highlight the beauties that graced my spring container garden.

I highly recommend planting tulips, as an easy individual or family project. It’s one that will bring you a lot of joy for relatively little effort.

Apricot Beauty

I love apricot-sherbet colored tulips, and the early-blooming Apricot Beauty did not disappoint. A single tulip with a nice classic shape on an 18″ stem, the Apricot Beauty looked great with its companion flowers, the Beau Monde and the Negrita, and, in particular, really helped welcome Spring.

Beau Monde

I find the delicate, bi-color Beau Monde to be very painterly. An early Triumph, with a pleasing shape on an 18″ stem, it featured wonderful blush-colored swipes on bright white petals.

Negrita


Accompanying the prior two in their early spring box was the Negrita, which, interestingly, lasted much longer than the other two. This is a beautiful Triumph tulip, with a great shape and distinct deep magenta color. It’s a good performer, and stands 22″ high, with a wonderful drama and color to it that allows it to mix well with lots of different flowers or stand on its own.

White Parrot

The lovely White Parrot tulips were the last of all the tulips to come up. This is a great, late-season creamy white tulip with varying brushes of grass green traveling from stem to flower. Fairly large flowers sit on 20-22″ stems. Though I found the typical parrot “frills” to be a bit more subtle than they are on other types, this is just a very pretty flower.

Until next year!

Photos by Susan Sachs Lipman

Tulipmania 2010, Part 1

A few centuries ago — before the peak of the dot-coms and the housing market and, well, banks and investment companies — it was a flower that caused a giant investment craze and its subsequent crash.

Drawn by their intense color and beauty, wealthy 16th and 17th century Dutch and Germans paid increasingly extravagant prices for the Turkish exports. In 1634 a Dutch man paid roughly half his fortune for a single bulb, solely for the purpose of admiring it. The mania continued to increase. More and more people sold their houses and land to purchase tulips, until their money was fairly worthless, goods and services were priced beyond what people could afford, and people had to barter in the bulbs. Still, they threw themselves lavish parties, with beautiful tulips everywhere, until at last a tulip deal, for 10 Semper Augustus bulbs, went sour. On that first default, people started to panic. Prices dropped precipitously, and people found themselves in financial ruin.

This is the Semper Augustus bulb:

Luckily, today, in the U.S. in 2010, I can get beautiful tulip bulbs for under $1 apiece, refrigerate them (through our mild northern California winters), plant them, and have a deck full of lovely tulips in spring. All but the last of this year’s tulips are a memory. But, what a memory they were!

Parade


Pictured at the very top of this post and above, is the Parade tulip, which performed extremely well. The bulbs are huge, and the bright vermilion red flower sits atop a sturdy stem that rises to a great 22″-24″ height. They seemed to last a long time, too. I planted them to alternate with the Golden Apeldoorn tulips. Both are Darwin Hybrids that came up at the same time, in the middle of tulip season.

On sunny mid-afternoons, their petals would fly open in the sun.

Golden Apeldoorn


A beautiful companion to the Parade, the Golden Apeldoorn matched it in size, color and majesty. It has a wonderful rich yellow color, a beautiful shape and a sturdy 22″-24″ stem.

You can’t beat this bright, cheery color combination for welcoming spring.

My next post will feature my other spring tulips: Apricot Beauty, Beau Monde, Negrita and White Parrot.

Tulip history is from the excellent 1841 (reprinted in 1980) book, Extraordinary Popular Delusions & the Madness of Crowds, by Charles Mackay.

More information about choosing, storing and planting tulips can be found in my earlier post here.

Photos by Susan Sachs Lipman, Drawing, Public Domain.

Related Posts Plugin for WordPress, Blogger...